In all these circumstances, the term ‘verify’ means to check that particular requirements have been met. In the UK, and many other parts of the world, it has traditionally been associated with a proof load test of every item of equipment. This procedure may serve to check some aspects of the design, and to a certain degree the quality of material and workmanship. However, it is certainly not a comprehensive approach; without additional verification it can result in unsuitable equipment going into service. Reflecting this, modern verification encompasses a number of different methods, from a simple visual examination to the most complex of tests.
In an era of globalisation, lifting equipment comes from all corners of the world and differs widely in terms of both complexity and quality. At one extreme are simple, mass produced, low cost items. At the other end of the scale are sophisticated bespoke systems with six-figure price tags. But whatever the nature of the product, in order to verify their suitability and safety, the methods used must check effectively those properties that are safety critical.
The ‘essential requirements’ of a product represent the starting point for verification. Within the European Union, directives list the essential health and safety requirements, in terms of the hazards which the manufacturer must assess and take account of if they are relevant to their product. In identifying the problems to be addressed, rather than the solutions, the directives give manufacturers considerable freedom to innovate. With this freedom comes significant responsibility. Fortunately, Harmonised European standards (CEN) can provide detailed solutions. These are robust standards, and whilst their special status only applies within the European Union, they are proving valuable tools in other parts of the world as well. In any case, the basic philosophy of identifying the requirements or properties essential to safety, then ensuring they are met, is valid in any country.
The method of verifying that a particular requirement or property has been met clearly depends upon the requirement itself. It also depends on whether the product is to be manufactured in volume or small quantities, and if the manufacturing process means that the quality can vary from one item to another. This is perhaps best explained by examples of what various methods of verification can achieve (see Table 1).
The manufacturer should first consider what method will verify the property in question. Then the manufacturer needs to determine whether that property can vary from item to item. If it can, will it be a gradual variation that can be monitored by sampling, or could each item vary significantly and therefore need to be individually verified?
For example, links are usually manufactured in large quantities. To verify that a link reaches its minimum failure load, a load test to failure of some representative samples is appropriate. This is known as type verification and verifies that the particular design, size, material specification and heat treatment give the mechanical properties required. If nothing varies, it need not be repeated. However, if the material used may vary, or if the heat treatment is done in batches which may vary, then sampling of each batch may also be necessary.
If the link is produced by forging, then cracks and other imperfections may occur in individual links and lead to failure from fatigue. These can best be detected by a suitable non destructive test. But if the link is formed from bar and welded, the strength of the weld will be a critical factor. Depending on how well the process can be controlled, it may require regular sample testing or proof load testing of every link.
Some requirements are more complex. For example, an item which must operate at low temperature may be prone to brittle failure if manufactured from the wrong material. Load testing at room temperature will not reveal this. Performing a Charpy test at the required minimum temperature on test pieces taken from sample items will verify that the material meets this requirement.
Because of the size of some items, it may not always be possible to obtain a suitable test piece. Standards often solve such problems by controlling them in some other way, such as limiting the choice of material to those known to perform satisfactorily. Verification of that requirement then becomes a matter of checking the material specification and verifying the heat treatment.
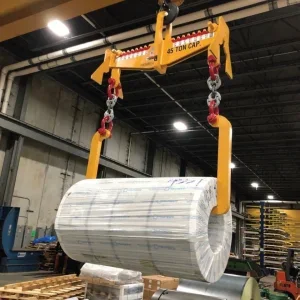
When producing one off items such as a bespoke lifting beam, verification of the design calculations will be necessary, as requirements such as the ultimate failure load cannot be determined by testing without destroying the item. However, the calculations can predict some aspects of performance which can be checked, such as the deflection at the working load. If the measured deflection matches that predicted, it is a good indication of the accuracy of the design in that respect.
One of the principles of good design is to eliminate potential hazards at the design stage whenever possible or, if not possible, to reduce the risk to a minimum. Any remaining risk should be controlled by guards or other means. The lowest level of control should be the instructions for use. When designing equipment employing attachment by vacuum or magnet, the designer must consider what might be the consequences of critical components failing. Depending upon the intended application, such equipment often has secondary or back up systems. By analysing what will happen if a component fails, the designer can ensure that the equipment either fails to safety or gives sufficient warning to allow any persons within the danger zone to leave.
These examples illustrate the approach upon which the latest generation of standards are based. When equipment is made to a standard it is simply a matter of following the verification procedure set out in that standard. But where there is no standard, or equipment is manufactured to other specifications, this general approach will still serve to guide those responsible towards the right methods of verification.
Although most lifting equipment is manufactured by specialists, there are still a significant number of items, such as lifting beams, gantries and runways, manufactured by general fabricators. LEEA members regularly report receiving requests from such manufacturers to ‘test and certify’ an item, confidently expecting the member to hang on some weights and issue a certificate to the effect that it is safe to use. Hopefully this article has made it clear that there is rather more to the process of verification than this. There are, however, occasions when a knowledgeable manufacturer that lacks the special facility required will subcontract the testing. In such cases the manufacturer should specify the test required, either directly or by reference to a standard, and the tester should perform it and report the result. This will then form part of the information used by the manufacturer to determine whether the product is satisfactory or not. Regardless of where the tests are done, this decision remains the responsibility of the manufacturer.


